
The Interior Studio: An AI Workflow Built by Architects, for Architects
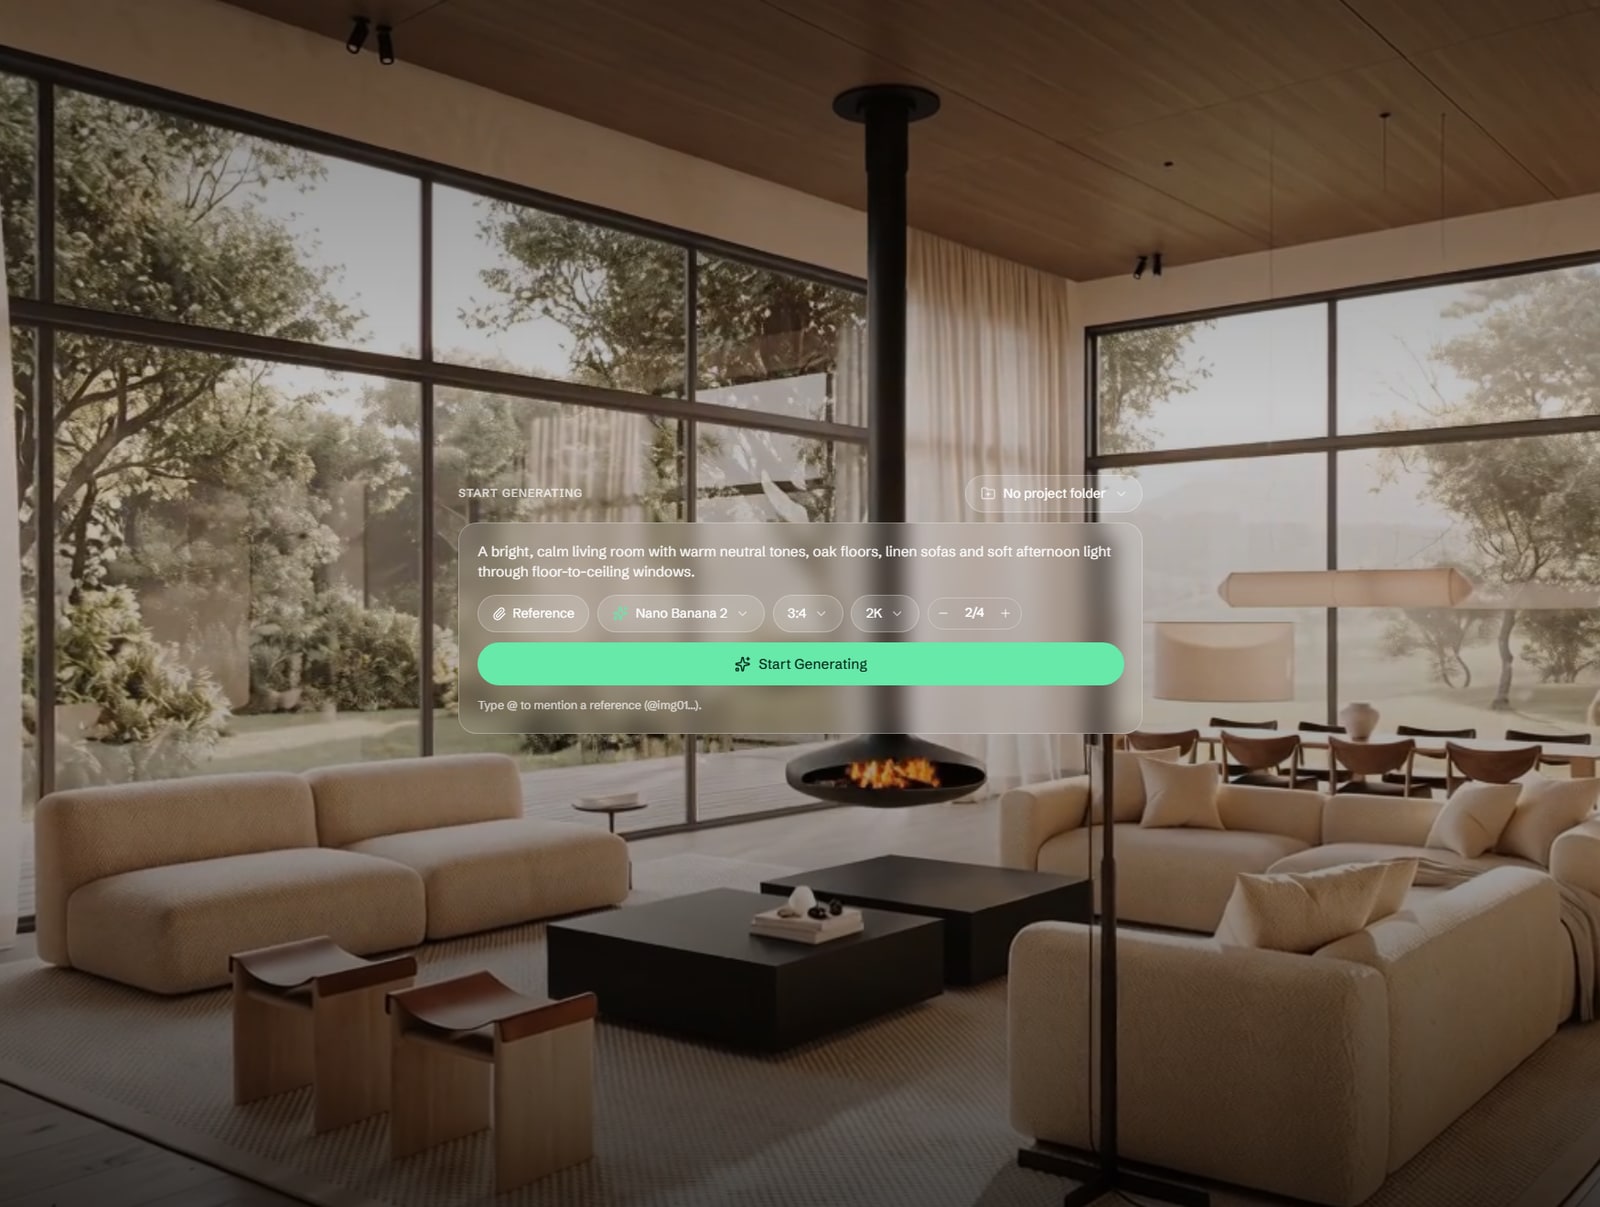
We are two architects. We built this because the AI tools we tried were solving the wrong problem.
They are all built around a single transaction: describe a thing, receive a picture. That is a wonderful way to make one striking image and a terrible way to design a space. Design is not a prompt — it is a hundred small decisions made in sequence, each one responding to the last. You do not describe a room into existence. You put something down, look at it, and change it.
So The Studio is built around the loop rather than the prompt. This is how we use it on real work.
Why an architect's workflow is different
Three things a general image generator gets wrong for our work, every time:
- The structure is not negotiable. When a client asks what their living room could look like, they mean their living room. A tool that quietly moves the window, changes the ceiling height or invents a doorway has not answered the question — it has changed the brief.
- Materials come from suppliers, not adjectives. "Warm oak" is not a specification. The actual board, the actual stone, the actual fabric — those are what the drawing has to show, because those are what gets ordered.
- One image is never the deliverable. We work in options and revisions. The value is not the first render; it is being able to say "that, but the floor in concrete" fifteen times without starting again.
Every decision below follows from those three.
Step 1 — One brief, and the four decisions that matter
Everything starts on a single screen, and it is deliberately short. A description of the space, and four controls: the engine, the aspect ratio, the output resolution, and how many options to generate at once.

Two things on that screen do the heavy lifting and are easy to walk past.
Aspect ratio is a drawing decision, not a formatting one. 3:4 for a portrait interior that reads as a room you could walk into; wider for a plan-like establishing shot. Set it before you generate, because a crop afterwards throws away the composition you were choosing between.
Generate four, never one. A single image tempts you to accept it. Four forces a comparison, and comparison is how you actually see whether a proportion works.
Step 2 — References beat adjectives, and @-mentions tell them apart
This is the part that matters most and gets skipped most. Look at the bottom of that screen: Type @ to mention a reference.
Instead of writing "warm minimalism with oak and travertine" and hoping, attach the images — the supplier photograph of the actual oak, the actual travertine, the chair you have specified. Then @-mention each one in the prompt so the model knows which image is doing which job: this one is the floor, this one is the joinery, this one is the light fitting.
The difference is not subtle. An adjective gets you a plausible generic room. A reference gets you your palette. Materials come from suppliers, and this is where that fact enters the drawing.
It is not only living rooms
The same screen and the same loop handle a residential interior, an exterior, and a commercial space. That matters if your practice is not exclusively domestic — and the structure lock is just as useful on a facade as on a lounge.


Step 3 — Pick for the bones, not the finish
You now have four options. Choose against the right criterion, because the instinct is to pick the prettiest render and that instinct is wrong.
Pick the one whose bones are right — the proportion, the light direction, the way the eye moves through the space. Surfaces, colour and furniture are all cheap to change in the next step. Composition is not. A beautiful image with the wrong spatial logic is a dead end; a plain one with the right logic is a starting point.
Step 4 — This is where the design actually happens
Open the option you chose and you are in the editing view. Everything up to here was setup; this is the tool.

Nine operations, each of which changes one thing and leaves the rest alone:
- Edit by instruction — say what to change in plain language when none of the specific tools fit.
- Restyle — a different design language over the same space, with the architecture held still.
- Furniture from photo — place the actual specified pieces from supplier images, at the right scale and in the room's own perspective.
- Relight — golden hour, blue hour, overcast, warm evening. The fastest way to make a scheme feel resolved.
- Material swap — this floor becomes poured concrete; nothing else moves.
- Staging — furnish an empty room, or strip a furnished one back to its shell.
- Add people — scale and life, which clients read as warmth more than any material does.
- Camera angle — re-shoot the same room from the opposite corner, or at eye level.
- Extend — outpaint past the frame when the crop is too tight, with the original pixels untouched.
Then Enhance, marked as the finishing step, which takes the final frame up for presentation.
The strip along the bottom is the part that makes this a design tool. Every edit becomes a saved version sitting next to the last one. Try concrete, look at it, step back to the previous version and try terrazzo instead. Branch from whichever one has the better light. Nothing is destructive and nothing sends you back to a blank prompt box — which is exactly the loop a design conversation already follows.
Each version also carries what produced it — engine, aspect, resolution and how long it took — so when a client picks option four out of nine, you know precisely how to make more like it.
The structure lock, and why it is on by default
Most edits run with a structure lock: walls, windows, ceiling lines, floor lines and room proportions held pixel-identical while the surfaces change. It is on by default because in our experience it is right roughly nine times out of ten, and the failure mode when it is off is bad — you present a render and the client asks why their window moved.
Two operations deliberately ignore it. Relight carries its own lighting-only instruction, and camera angle changes the viewpoint by definition, so pinning the lines would contradict the request. That is a considered exception, not an oversight.
How this fits a real project
Early concept. Generate from a description with a mood board attached. Three or four directions in an afternoon, at a stage where a physical model or a full render would be unjustifiable.
Client presentation. Upload the photograph of the actual room, restyle it two or three ways with the structure locked, relight each to the same hour so the comparison is fair, enhance to 4K. The client is looking at their own space, which is the only version of that conversation that goes well.
Specification. Material swaps against real supplier images, so the render matches what is being ordered rather than an approximation of it.
Letting agents and staging. An empty listing furnished, or a cluttered one cleared, without a stylist and a van.
What it does not do
It is not a modelling tool and not a substitute for one. There is no geometry, no dimensions, no schedule, nothing to hand a contractor. It does not replace your CAD or BIM model, and a render out of it is not a construction document.
What it replaces is the days between "I think it could look like this" and having something a client can react to. In our practice that is where most of the time went, and it is the part that never justified its cost.
Start here
Open The Studio and upload a photograph of a room you know well — your own, ideally, because you will spot immediately whether the structure held. Restyle it once. Then relight it. Two edits is enough to tell whether this fits how you work.
New accounts start with 750 free credits and no card.
Frequently asked questions
Was this really built by architects?
Yes — by two of us, for our own practice, before it was a product. Every decision in the tool comes from a workflow we were already running by hand: structure locked by default because a client notices a moved window immediately, references over adjectives because materials come from suppliers, and an editing loop rather than a prompt box because design is revision. That is why it behaves differently from general image tools.
Will it keep my room's actual layout?
That is what the structure lock is for, and it is on by default: walls, windows, ceiling and floor lines and room proportions stay pixel-identical while materials, furniture and lighting change. Relight and camera angle deliberately ignore it, because changing the light or the viewpoint is the request in those cases.
Can I use my own materials and furniture?
Yes, and you should — it is the difference between a generic result and your scheme. Attach supplier photographs as references and @-mention them so each has a job: this is the floor, this is the joinery, this is the chair. Furniture from photo places actual specified pieces into the room at the right scale and perspective.
Is this a replacement for CAD or rendering software?
No. There is no geometry, no dimensions and nothing a contractor can build from. It replaces the gap between an idea and something a client can react to — the early, iterative, presentation-facing part of the work, not the technical documentation.
What resolution can I present at?
Enhance takes the final frame to 2K or 4K, which covers screen presentation and most printed boards. For very large format, the upscaler goes considerably further — up to 22K.
Does it work for exteriors and architecture, not just interiors?
Yes. The same loop applies to facades, massing studies and site context — restyle, relight, change the camera, extend the frame. The structure lock is just as useful outside as in.